


Embarking on a COLORBOND wall cladding installation project and wondering how to install COLORBOND wall cladding? Dive into this comprehensive guide, filled with practical tips, insights, and expert advice. Whether you’re a seasoned professional or a DIY enthusiast, these invaluable recommendations on how to install COLORBOND wall cladding will elevate your installation process and guarantee a stunning outcome.
Essential preparations
Kickstart your COLORBOND journey with meticulous preparations. Before diving into installation, ensure your workspace is organised and all materials are readily available. Proper preparation sets the stage for a smooth and efficient installation process.
Site inspection and measurement
Begin by conducting a thorough site inspection. Accurate measurements are crucial for ordering the right amount of COLORBOND material. Consider environmental factors, such as exposure to elements, to determine the appropriate cladding type.
Surface preparation
A clean and properly prepared surface is paramount. Remove any existing cladding, address structural issues, and ensure a flat, even substrate. A well-prepared surface provides the ideal canvas for a flawless COLORBOND installation.
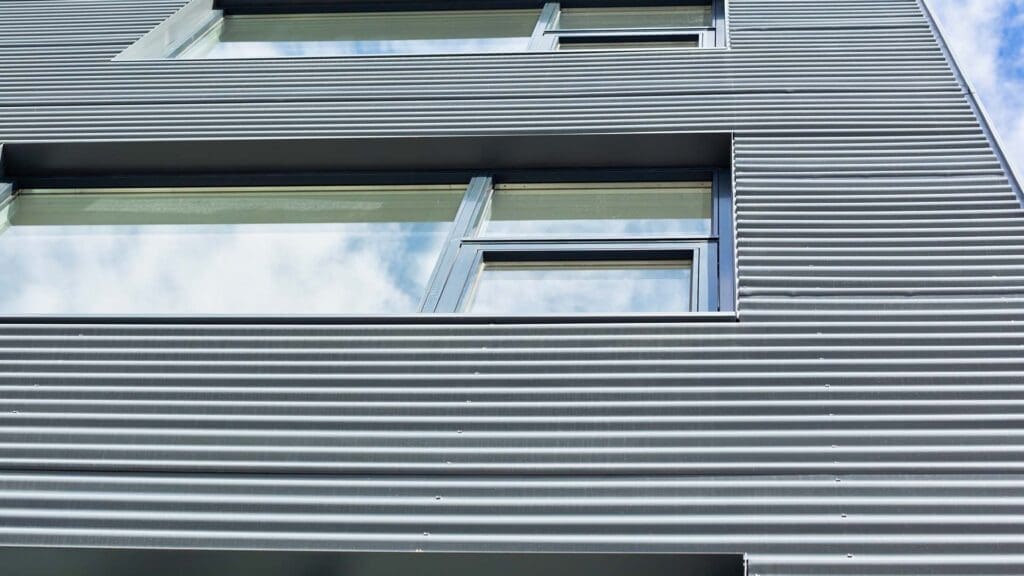
Proper handling of COLORBOND material
Understanding the characteristics of COLORBOND material is essential for a successful installation. Mishandling can lead to damage and compromise the overall quality of your project.
Handling and storage
COLORBOND material is prone to scratching, so handle it with care. Store panels horizontally to prevent warping. Implement protective measures, such as covering the material, to safeguard against dust and debris during storage.
Cutting techniques
Invest time in mastering cutting techniques. Use appropriate tools to achieve clean, precise cuts. Accurate cutting ensures seamless joints and enhances the aesthetic appeal of the finished cladding.
Installation techniques
The installation phase demands precision and attention to detail. Follow these tips to ensure your COLORBOND wall cladding is installed with finesse.
Correct fastening methods
Selecting the right fastening method is crucial for the stability and longevity of your cladding. Follow manufacturer guidelines for spacing and positioning of fasteners. This ensures optimal structural integrity.
Weather considerations
Keep an eye on the weather forecast. Ideally, choose a dry day with moderate temperatures for installation. Adverse weather conditions can hinder the process and compromise the effectiveness of adhesives and sealants.
Finishing touches
The final steps of your COLORBOND installation are just as important as the initial ones. Pay attention to the finishing touches to achieve a polished and professional look.
Sealant application
Apply a high-quality sealant to joints and edges to enhance weather resistance. This step not only protects against the elements but also contributes to the overall aesthetic appeal.
Quality inspection
Conduct a thorough quality inspection before considering the project complete. Check for any signs of damage, uneven surfaces, or inadequate sealing. Rectify issues promptly to ensure a durable and visually pleasing result.
Now, let’s delve deeper into how to Install COLORBOND wall cladding with five essential tips that will elevate your installation to the next level.
1. Accurate measurement matters
Achieve precision by measuring twice and cutting once. Accurate measurements ensure you order the right amount of COLORBOND material, minimising waste and saving costs.
2. Mindful handling for impeccable finish
Handle COLORBOND material with care to prevent scratches. A scratch-free surface enhances the visual appeal of your cladding, providing a professional and polished finish.
3. Adopt proven cutting techniques
Invest time in mastering cutting techniques. Clean, precise cuts contribute to seamless joints, elevating the overall aesthetics of your COLORBOND Wall Cladding.
4. Follow the manufacturer’s fastening guidelines
Optimal fastening is crucial for structural integrity. Adhering to the manufacturer’s guidelines for spacing and positioning of fasteners ensures a stable and long-lasting installation.
5. Weather-proof your installation day
Check the weather forecast before starting the installation. Choosing a dry day with moderate temperatures ensures ideal conditions for adhesives and sealants, contributing to the durability of your cladding.
Mastering the art of COLORBOND wall cladding installation is within reach with these expert tips. Elevate your project by focusing on accurate measurements, careful handling, precise cutting, following manufacturer guidelines, and choosing optimal installation days. By incorporating these recommendations, you ensure a stunning and enduring result that enhances both the aesthetics and functionality of your space.
How to install COLORBOND wall cladding—start your installation project today
Revitalise your space with ClickSteel, the perfect companion for your COLORBOND wall cladding project! Seamlessly combining strength and style, ClickSteel offers unmatched durability and a sleek finish that enhances the aesthetic appeal of your space. Elevate your installation experience with the perfect synergy of COLORBOND and ClickSteel. Take the first step towards a stunning transformation. Contact us now to explore our premium ClickSteel collection and make your project a resounding success!